Terms First:
My favorite style of mosaic is made with hand-cut tiles called Pique Assiette (loosely translated it means cracked china). All types of glass or china used in mosaics is call "tesserae." I cut antique or vintage dinnerware into tiles specifically made for mosaics. Contrary to popular belief, the china is cut with special cutters or nippers NOT smashed with a hammer.
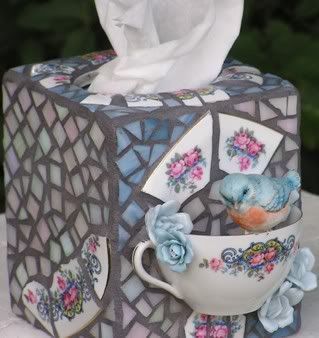
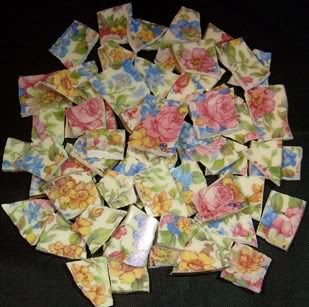
The base that mosaic tiles are adhered to is called a substrait.
For the purpose of this tutorial, I will not refer to the proper names, I will use the terms "base" and "tiles." I've also included pictures of what Pique Assiette tiles look like. There was a time when a Pique Assiette artist needed to know exactly how to cut the china but today they can be readily purchased pre-cut; simply mastering the cutting process takes a bit of time and for some not worth the effort. You can find hand-cut tiles in my Etsy Store under the China Mosaic Tile sub-heading.
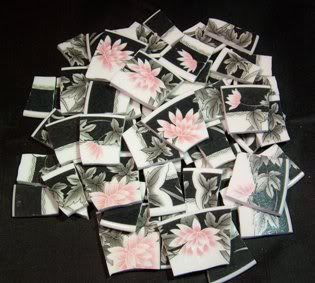
The base structure can be made from just about any kind of material that will not be affected by moisture. Wooden bases must be sealed first. I have used wood, glass, metal, silver serving pieces, etc. Mosaics can be made vertical or horizontal. The only difference in the two (vertical or horizontal) is the type of adhesive used.
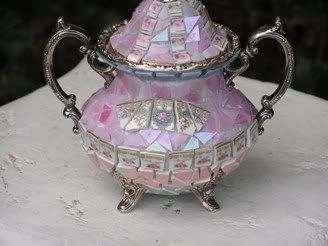
For the beginner I suggest purchasing a base from a craft store; that could be a birdhouse, a plaque, or anything that is of interest. This piece must be well sealed and I use acrylic paint, back and front - and it doesn't have to be perfect. Once sealed you are on your way to creating a mosaic beauty!

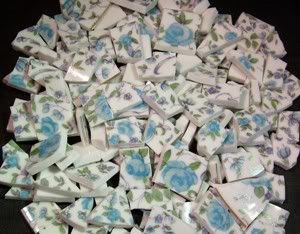
Lay out your tiles in the design that is appealing to you (on the table next to you). On a flat base you simply need a "good" white glue or adhesive. Craft stores sell a produce called Weld Bond, but I use a strong white adhesive from the big box home stores, because it is much less expensive and works as well if not better. If you plan to mosaic a vertical base I suggest using a thicker adhesive such as silicon.
Apply adhesive in small areas and spread with a Popsicle stick OR an old credit card works great too. Begin to place your tiles where you want them. Tiles must "set" to the adhesive typically 24 hours before you are ready to grout. if any adhesive spreads between the tiles, wipe off immediately so it will not show during the grouting process.
Note: The closer you place your tiles together, the happier you will be with your project.
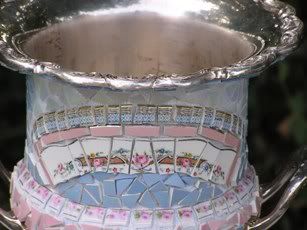
Grout can be purchased in small bags in any big box home store. I recommend "sanded" grout for the beginner as it is much easier to work with. Follow the manufacturers directions for mixing. Depending on the size of your base you can eyeball the amount of grout you will need. Once mixed the grout should be the consistency of peanut butter.
I use gloves and apply grout by hand but there are several little tools that can be used. Make sure grout is pressed firmly into the areas between the tiles. Once fully applied, with a very damp sponge wipe the excess grout off the tiles. If grout starts to come out, simply replace it with your fingers and press.
There is no right or wrong way to apply the products above however, using the principals I've outlined will give you the desired result.
After about 20 minutes of grout setting, wipe or buff with a dry paper towel to remove any grout residue from the tiles. Let set for 24-36 hours to cure and dry completely. Grout must be sealed to keep moisture out and prevent cracking. Seal with any good clear sealant ~ and viola, you have created a piece of mosaic art!
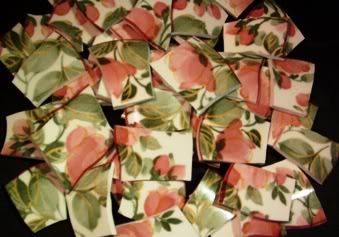
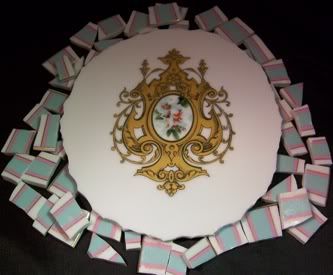
I have many tiles from Antique and Vintage dinnerware in my CremeMagnolia Etsy store and below are a couple of examples. Learning to cut tiles is an ardious process that many don't undertake. My store sells mosaic tiles at the lowest possible prices!




That tissue box is really amazing! I love how the cup just stands out.
ReplyDeleteoh so pretty, I once did a patio table it turned out so nicely. Love the tissue box.
ReplyDeleteYour work is fabulous!
ReplyDeleteThanks for the comment!
ReplyDeleteI have been saving some broken dishware for mosaics! Thanks for writing about it.
So generous of you to show everyone how to try this out! I'll have to check back when my daughter and I attempt to make a mosaic table this summer.
ReplyDeleteWow - you have some really beautiful pieces! Thank you for visiting my blog today and commenting - and it did make my day : )
ReplyDeleteThose are amazing! LOVE the first one!!
ReplyDeleteYou make it sound almost easy :)
Love your mosaic projects! Fantastic!
ReplyDeleteWow, those pieces are so nice. Usually when I see this kind of art it's just thrown together, so it doesn't look very good, but you've really put a lot of effort into those!
ReplyDeleteI have always wanted to try this, but been too chicken!
ReplyDeleteThanks for this - I want to make mosaic stepping stones for my garden, so these are great tips!
ReplyDeleteThis is a clearly written tutorial that makes anyone feel they can tackle the art of mosaic. That being said, your pieces are GORGEOUS!
ReplyDeleteThank you for commenting on my mosaics. This really is a craft that anyone can master!
ReplyDeleteOk... shattered a beloved ceramic platter made for me many years ago by a friend. I carefully saved all the big pieces, and I have come back to find this post so I can use the pieces to make something out of them... wish me luck, I will post a pic if I am successful!
ReplyDelete